Installing and Configuring Xerox Print Drivers
Installing Xerox Print Drivers on the FaxPress Enterprise server is only required if the Xerox system, rather than another third party printer, will be used to print hard copies of faxes and fax notifications from the FaxPress Enterprise.
Installing Xerox Print Drivers
To install the Xerox print drivers on the FaxPress Enterprise, follow these steps:
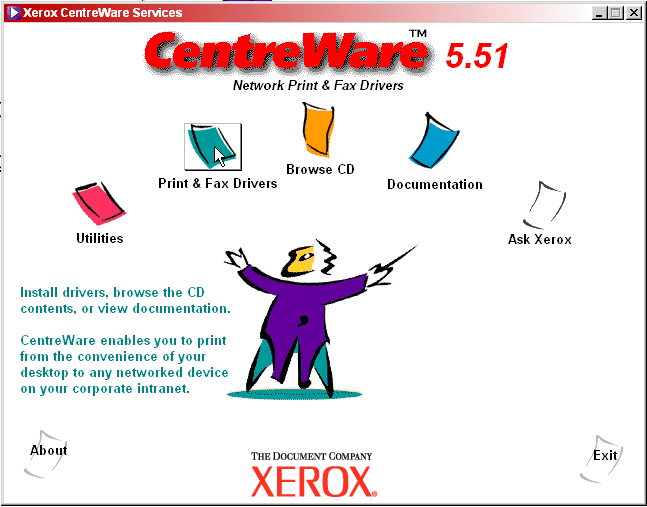
| 1. | Insert the Xerox CentreWare print and fax driver CD into the CD-ROM drive on your workstation. The CD will be labelled CentreWare Print and Fax Drivers (version number will vary). |
| 2. | The CentreWare welcome screen requires you to select your language and click OK. |

| 3. | Click the Print & Fax Drivers option. |

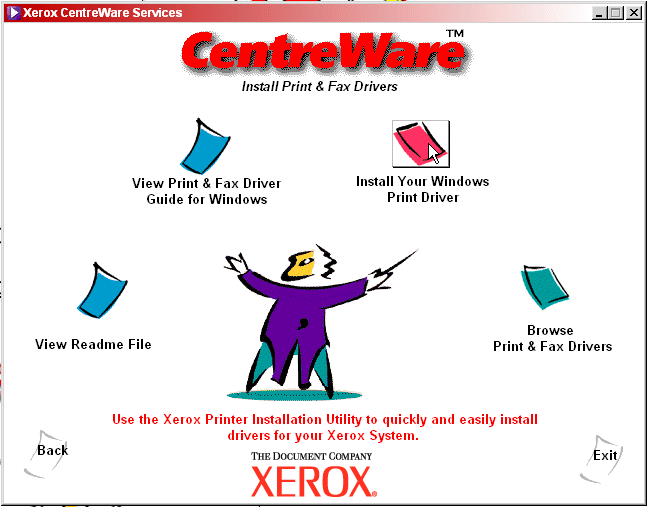
| 4. | Click Install Your Windows Print Driver. |
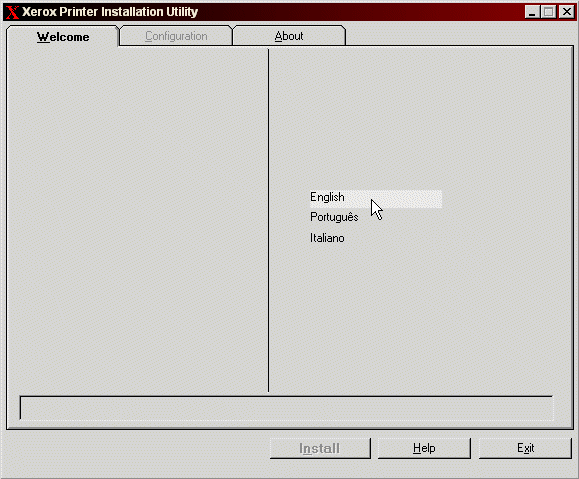
| 5. | In the Printer Installation Utility window, select the appropriate language option.. |
| 6. | The Configuration tab appears. |
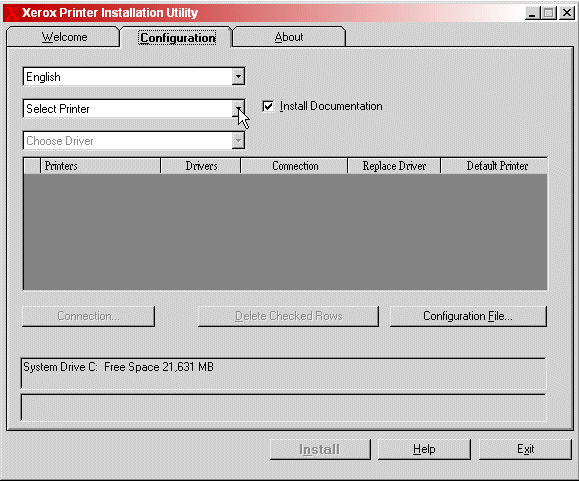
| 7. | Select your Xerox system from Select Printer pull-down menu. |

| 8. | Select the print driver for this printer from the Choose Driver pull-down menu. |

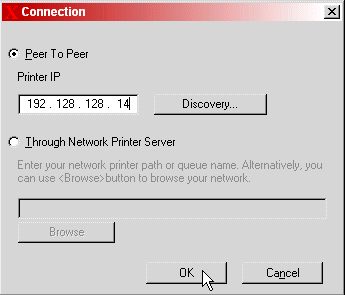
| 9. | Click the Connection button to open the Connection dialog box. Enter the IP address of the Xerox system, then click OK. |
| 10. | Clicking OK returns you to the Configuration tab. Check the checkbox to the left of your printer. |
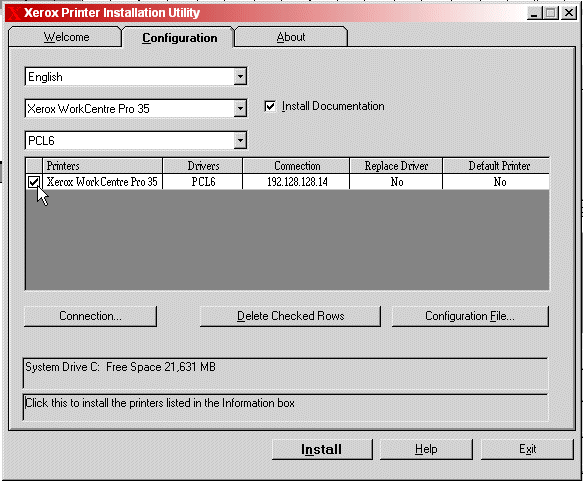
| 11. | Click the Install button to install the driver. To configure the installed driver, continue with the next section of this chapter. |
Configuring the Xerox Print Driver
Once installed on the FaxPress Enterprise, the Xerox Print Driver must be configured. To configure the Xerox Print driver, follow these steps:
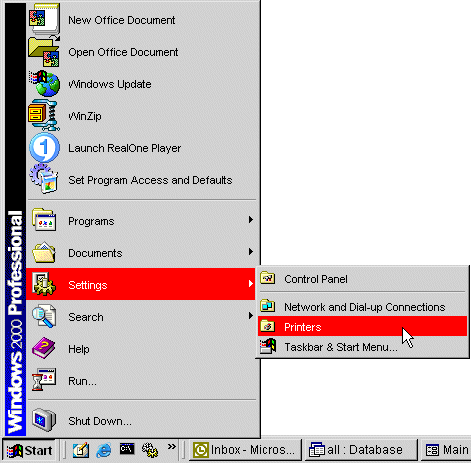
| 1. | From the Windows desktop, go to Start>Settings>Printers. |
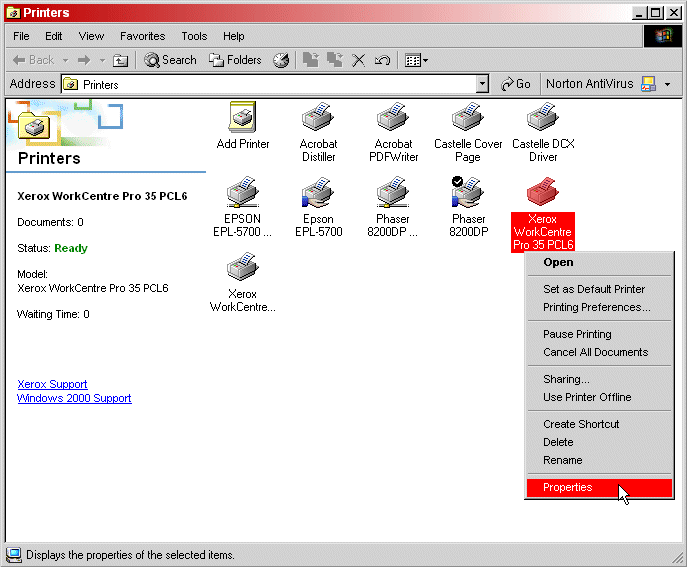
| 2. | In the Printers window, right-click on the Xerox system icon and select Properties. |
| 3. | In the Xerox system Properties window, click the Printing Preferences button to open the Preferences screen. |
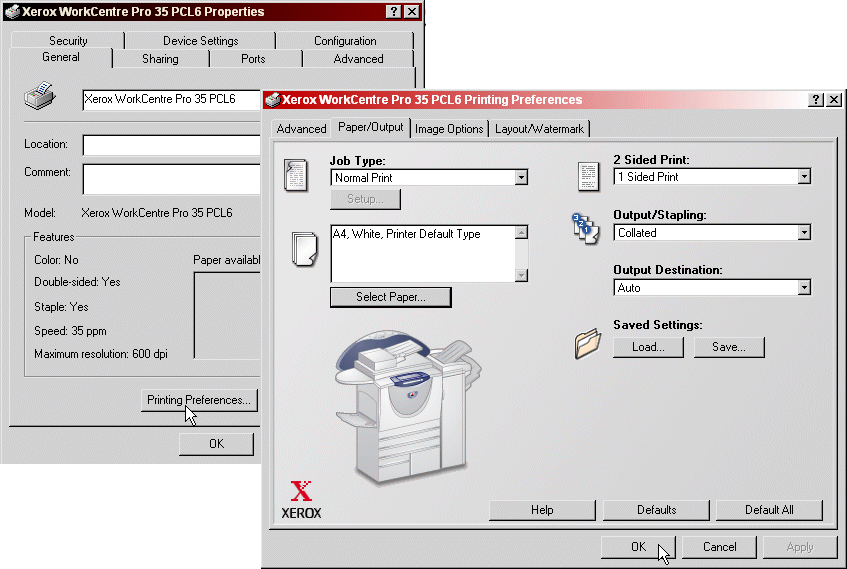
Typically, you can leave all the settings at their defaults, with one exception. If Network Accounting is enabled on your Xerox sytem, you must specify the default User ID and the System ID in the Device Settings tab (Accounting>Setup) of the printer driver properties. If your situation requires special settings, make them with caution. Castelle recommends that you do NOT change any advanced options unless you are certain that the changes will work without any unwanted side effects.
| 4. | Click OK. |
| 5. | Test the printer from the workstation, and test printing a fax or fax notification. |
Setting up Additional Paper Colors on the Xerox System
The FaxPress Enterprise Xerox Interface supports the use of more than one paper color for printing. This feature would, for example, allow one color paper to be used for fax print-outs, and another color to be used for fax notices. This procedure assumes that you have 2 trays with different colored paper in your Xerox system and also requires the FaxPress Enterprise Xerox Interface service is configured and running.
To set up your print drivers for multiple paper colors, follow these steps:
| 1. | For each special paper color, create an extra local print driver for your Xerox system on the FaxPress Enterprise server, using the procedure in Installing and Configuring Xerox Print Drivers. |
| 2. | Rename the extra printer drivers for each color. For example, if you have a driver you want to use for Red paper, first choose |
Start>Settings>Printers
| 3. | In the Printers window, select the new driver you have created and add RED to the name; so Xerox WorkCentre Pro 35 PCL6 would become Xerox WorkCentre Pro 35 PCL6 RED. |
| 4. | Rename each of the drivers for the different colors in this way. |
| 5. | Open the Properties screen for each driver, then click the Printing Preferences button to open the Preferences screen, as you did in Configuring the Xerox Print Driver earlier in this chapter. |
| 6. | In the Printing Preferences window, select the paper color for the driver. Click OK in the Preferences screen, and OK in the Driver Properties screen. |
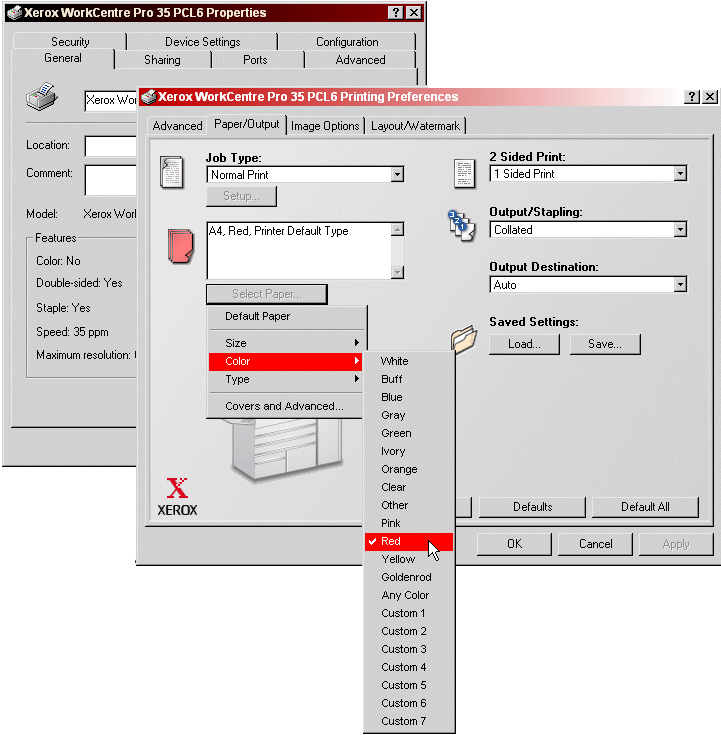
| 7. | Next, open the FaxPress Enterprise Xerox Interface Configuration Wizard from FaxPress Plus by selecting the Administration folder view, opening the Embedded Services folder, right-clicking on Xerox Interface, and selecting Configuration. (For more detailed information on opening the Configuration Wizard, see Accessing the FaxPress Enterprise Xerox Interface Configuration Utility. |
Move through the Configuration wizard by clicking the Next> button until you get to the User Map. Select a user, then click the Edit button.
| 8. | In the User to Email address Mapping dialog box, set up each printer setting for Print Incoming fax and Print outgoing fax notification with a different print driver. |
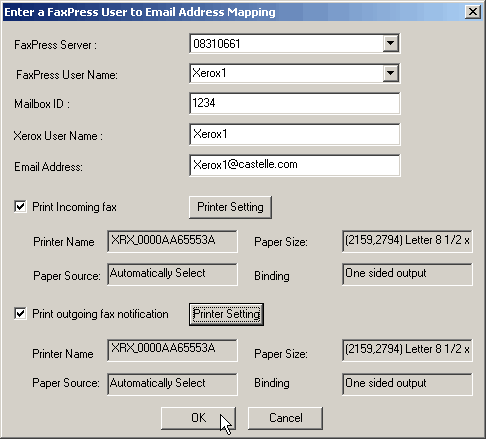
To set the RED driver for Incoming faxes, click the Printer Setting button for Print Incoming fax. Then choose the driver that ends in RED from the Printer Name pull-down menu and click OK. See the procedure in Configuring the FaxPress Enterprise Xerox Interface for details.
Repeat this procedure for the other color driver, this time clicking the Printer Setting button for Print outgoing fax notification.
Incoming faxes and outgoing fax notifications will now print out on different colored paper.
|
FaxPress Enterprise & Enterprise Redundant WebHelp
Last Updated: 11/1/2007
E-mail this page |
Castelle 855 Jarvis Drive, Suite 100 Morgan Hill, CA 95037 Toll-free 800.289.7555 Tel 408.852.8000 Fax 408.852.8100 |