After FaxPress Outlook Direct is installed, users can utilize the FaxPress server to send and receive faxes and view incoming and outgoing faxes from within Outlook. Sending faxes is as simple as sending email. Attachments are rendered into fax documents, which means you can send an attached file to both fax and email recipients simultaneously.
For incoming faxes, FaxPress Outlook Direct polls the FaxPress server and dispatches a notice to your inbox whenever you receive a new fax. To view the incoming fax, you can either allow Outlook Direct to convert incoming faxes to TIF, PDF, or DCX files and attach them to the notice (the default), or use the FaxPress Tools>View Incoming Faxes option Outlook Direct creates in your Outlook Tools menu. (See Viewing Incoming and Outgoing Faxes.) In either case, incoming and outgoing faxes can be viewed without leaving your mail client.
Using Outlook Direct to send a fax message requires that you address your email to the recipient’s fax number, rather than the email address. You may either address your fax messages using the Business Fax entries from your Contacts list, or you may address faxes by manually entering the recipient’s fax number. Both means of addressing are covered here.
Using your Contacts List to Send Faxes
The Contacts list, with its Business Fax, Home Fax, and Other Fax entries, is the best Address Book to use with Outlook Direct.
To use the Contacts list with Outlook Direct, you must make sure:
| ■ | the Contacts list is enabled for use as an e-mail Address Book. (If you’re already using the Contacts list to address email, it is.) |
| ■ | the Contacts list entries you use contain the recipient’s Home Fax, Business Fax, or Other Fax information. |
Enabling the Contacts List as an Address Book
To confirm or enable your Contacts list for use as an Address Book:
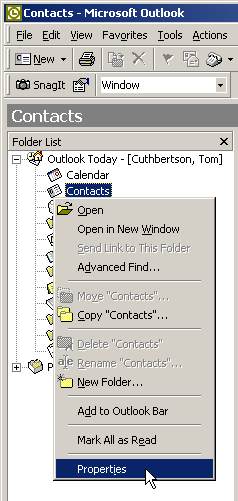
| 1. | From your Outlook Inbox, right-click on the Contacts folder or icon to display the context menu, then select Properties. |
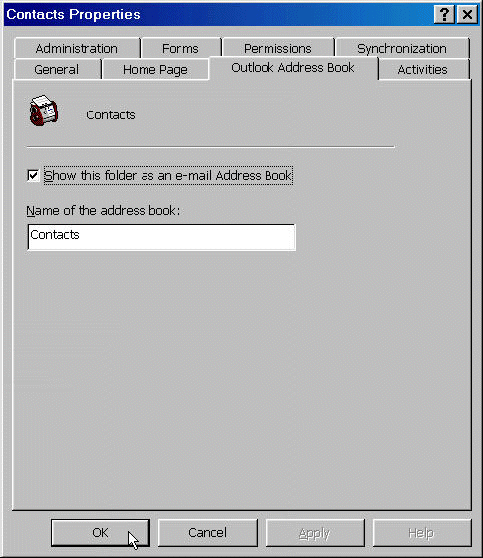
| 2. | Select the Outlook Address Book tab in the Contacts Properties dialog box. Check the Show this folder as an email Address Book option if it isn’t already, enter Contacts in the Name of the address book field, and click OK. Your Contacts list can now be used to send faxes. |
Sending a Fax Using an Existing Contacts List Entry
If your Contacts list entries do not yet include fax information, refer to Adding Entries to your Contacts List.
To use your Contacts list to send a fax message:
| 1. | OpenOutlook and select New Mail Message from the upper left hand corner of your Inbox. |
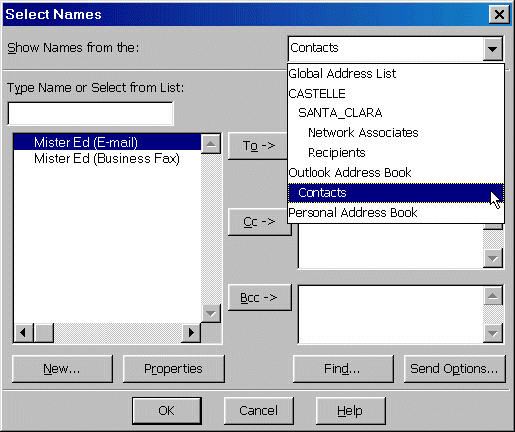
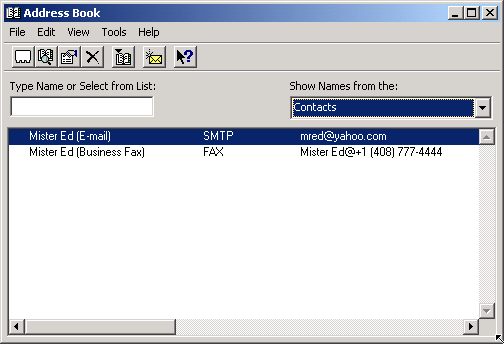
| 2. | Click the To: button to bring up your address books, and select Contacts from the pull-down menu in the upper right corner of the Select Names window. |
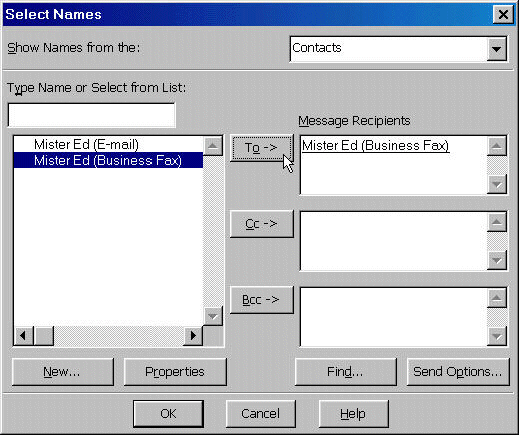
| 3. | Select your recipient’s Business Fax entry, click To:, then OK. |
| 4. | Fill in the subject field. The message body will appear on the Corporate Cover page message field. If the message exceeds the limit for the cover page message field, the additional text will appear on the additional page or pages. |
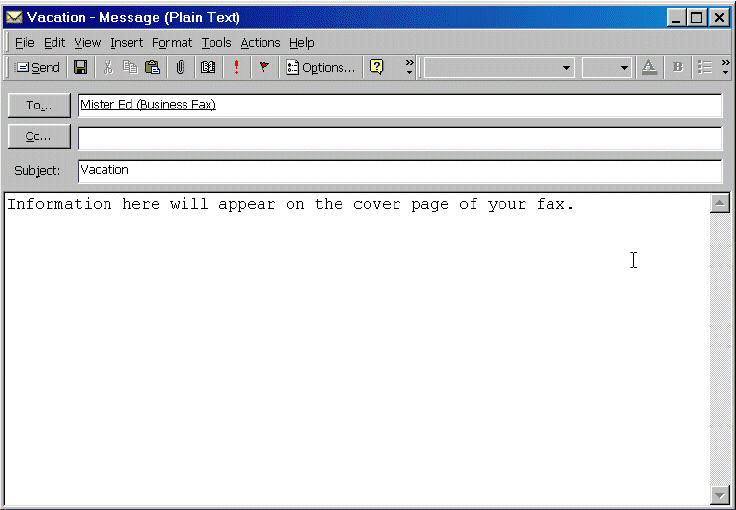
If Send message in rich text format (RTF) is chosen on the FaxPress Transport Properties’ Outgoing Fax tab, the message will always go on additional pages after the cover page.
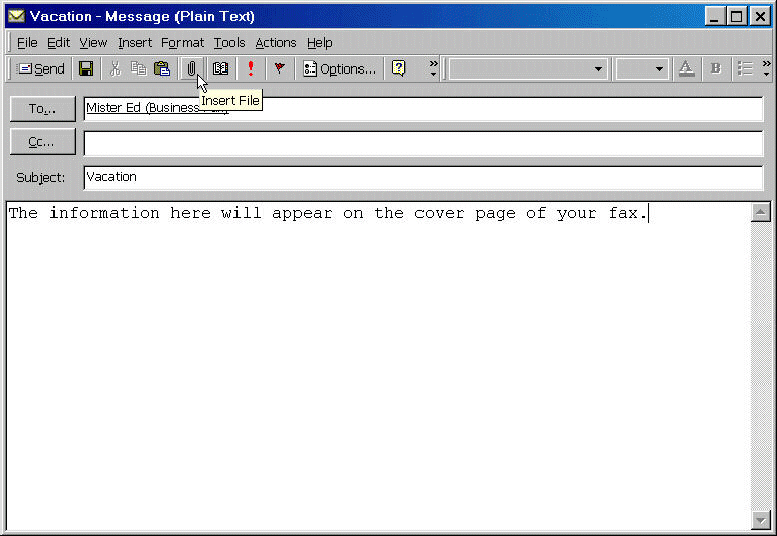
| 5. | Click the paper clip icon to attach a file for the fax recipient to your mail message, |
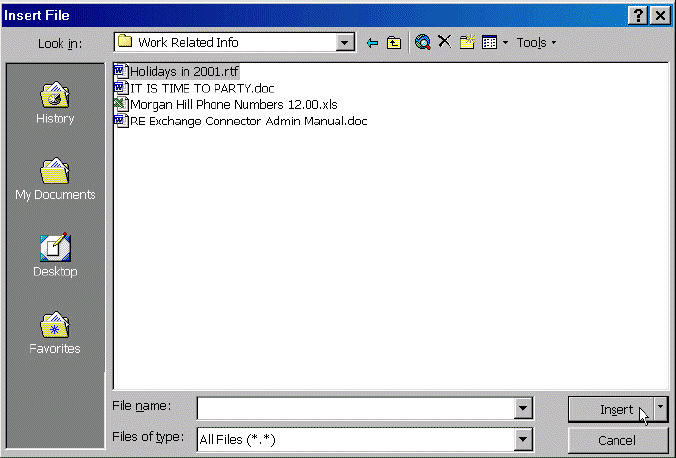
| 6. | The Insert File dialog box allows you search for the document you’d like to fax. Select the document, then click Insert. |
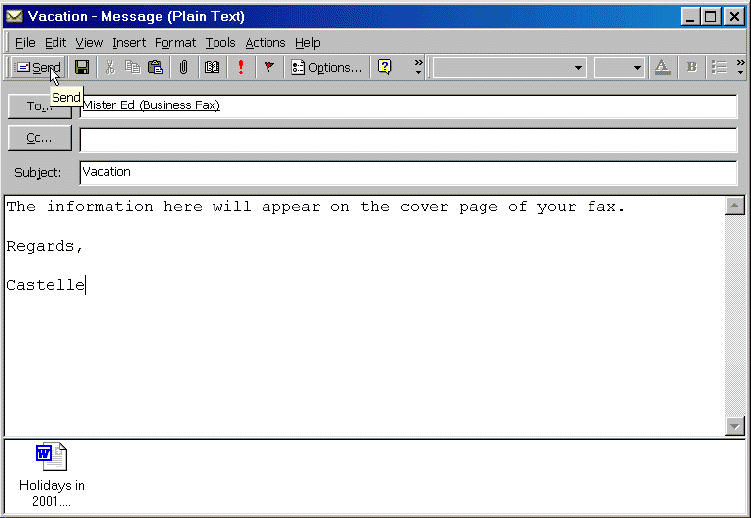
| 7. | You will see both the message and attachment. Your fax is now ready to send. Click Send. |
Adding Entries to your Contacts List
Use the information provided here to learn how to add new entries to your Contacts list. The Contacts list also allows you to import information (existing customer lists, other address books, etc.) from external data sources. Refer to Microsoft Outlook Help for details.
To add new entries:
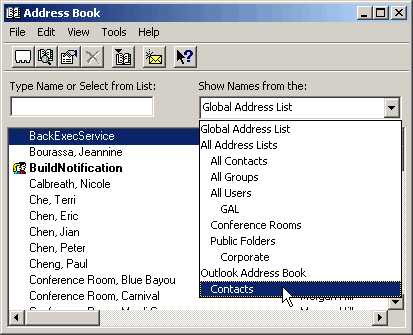
| 1. | Select Tools>Address Book, then select Contacts in the Show Names from the: pull-down menu. |
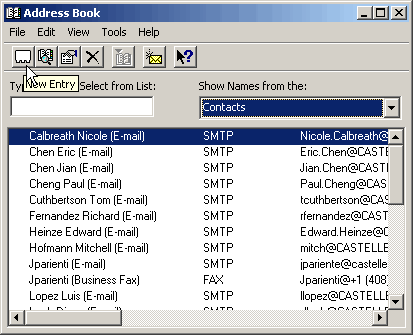
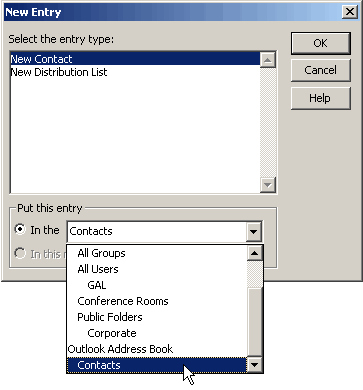
| 2. | In the New Entry window, select Contacts from the Put this entry in the: pull-down menu. Click OK. |
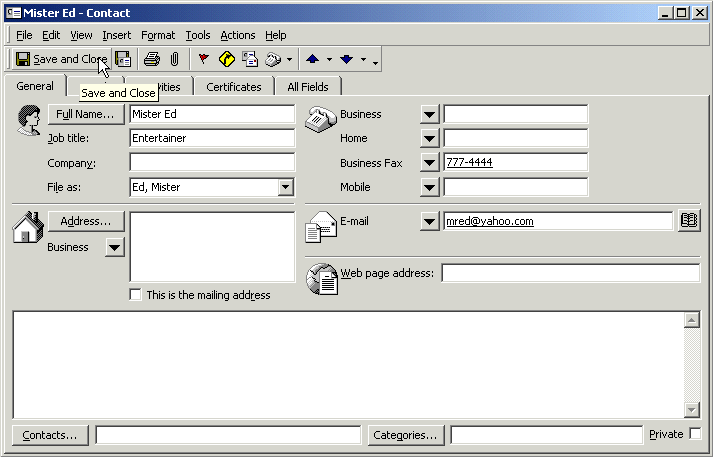
| 3. | Enter your contact’s information. Fax numbers must conform to international phone number format. Click Save and Close. |
| 4. | The Contacts list reflects the new entry. |
To address a fax without using your Contacts list:
| 1. | Select New Mail Message from the upper left hand corner of your Inbox. |
| ■ | Enter the recipient’s fax number in the To: field according to your choice of the following defined formats: |
| ■ | [FAX: fax-number] Open square bracket, type the letters FAX, colon, recipient fax number, close square bracket. Example: [FAX:408-555-1212] |
| ■ | [FAX:recipient-name@fax-number] Open square bracket, type the letters FAX, colon, recipient-name, pound sign, fax number, close square bracket. Example: [FAX: Ed Smith@408-555-1212] |
| ■ | [FAX:recipient-name/company-name@fax-number] Open square bracket, type the letters FAX, colon, recipient name, forward slash, company name, pound sign, fax number, close square bracket Example: [FAX: Ed Smith/Castelle@408-555-1212] |
The information entered will appear in the corresponding sender and recipient fields of your fax cover page. Use a semicolon as a delimiter to enter multiple recipients.
Outlook Direct supports only the recipient name, company name, and fax number addressing formats defined above.
|
FaxPress Enterprise & Enterprise Redundant WebHelp
Last Updated: 11/1/2007
E-mail this page |
Castelle 855 Jarvis Drive, Suite 100 Morgan Hill, CA 95037 Toll-free 800.289.7555 Tel 408.852.8000 Fax 408.852.8100 |