Creating Cover Pages with Microsoft Word
Custom personal cover pages can be created in Microsoft Word or WordPad by:
| 1. | using the Generic, Urgent and Confidential .doc templates provided in the FaxPress Cover Page Templates folder and then customizing the existing text and fax parameters. Castelle recommends this procedure to ensure compatibility with the FaxPress server software. |
| 2. | installing and using the Castelle Cover Page Macro to bring up a blank .doc file in Microsoft Word, and then adding text and the FaxPress keyword fields. |
Castelle strongly recommends that you use one of the .doc template files provided in the Cover Page Templates folder as a basis for your custom cover page template. This is the more convenient, efficient option of the two mentioned above, and is the one covered in the next section. See FaxPress can attach a corporate or personal, default or customized cover page as the first page to an outgoing fax. Typically, a cover page contains recipient and sender information, additional text and graphics. for details on creating a Cover Page from a blank document.
Customizing the Cover Page Templates
To use one of the existing Word-based Cover Page Templates to create a new custom cover page, follow these steps:
| 1. | Log into FaxPress (Start>Settings>FaxPress>FaxPress) |
| 2. | Expand your Mailbox’s Personal Folders branch. |
| 3. | Select the Cover Page Templates folder. |
| 4. | Open one of the .doc files provided. |
| 5. | The .doc file contains both boldface text that can be modified, and bracketed fax parameters that may be copied or removed, but which you cannot modify. If you alter the text or spaces between the brackets, the field will not be recognized by the FaxPress software. |
Here is an example of a custom fax cover page created from the existing Generic.doc file. The boldface text font has been changed, and a company name and logo graphic have been added. Note that the keyword fields have not been altered, and all 16 message lines are left in place.
| 6. | Rename and Save your customized cover page template to the Cover Page Templates folder. The name should be 8 characters long or less. |
To become available for use, the new cover page template must now be added to your personal Mailbox's Cover Pages folder.
Adding New Personal Cover Pages
To make your new, customized cover page template available as an optional cover page, follow these steps:
| 1. | Log into FaxPress (Start>Settings>FaxPress>FaxPress) |
| 2. | Expand your Mailbox branch. |
| 3. | Select your Cover Pages folder (not the Cover Page Templates folder) on the left. In the right panel, right-click and select Add. |
| 4. | Browse to the Cover Page Templates folder, and select the file name of a custom cover page template. The name must be 8 characters long or less. |
| 5. | Click OK to the Cover Page OK message. The customized cover page template will appear in your Cover Pages folder, and will also appear as an option in the Send Fax interface’s Cover Page field. |
Creating a Personal Cover Page From a Blank Microsoft Word Document
You can use Microsoft Word to create a simple, customized cover page for your own faxes. However, certain restrictions apply to this procedure.
| 1. | You CANNOT create a cover page template for use with the FaxPress server software without using the Castelle Cover Page Macro. The server software requires that each cover page template contain the correct keyword fields. These fields are ONLY available when using the Castelle Cover Page Macro in Microsoft Word. |
| 2. | You can change, reformat, or re-order the text you add to the template, but you CANNOT MODIFY any text or spaces between the brackets of the keyword fields. If you alter the text or spaces between the brackets, the field will not be recognized by the FaxPress software. |
Take the following steps to create your own custom cover page template, starting with a blank Microsoft Word document.
| 1. | After installing the FaxPress 8.0 software, choose the command, Start>Programs>FaxPress>Install Cover Page Macro. |
| 2. | After installing the Cover Page Macro, open Microsoft Word, and open a new, blank document. Note that there is a new menu in the menu bar, for the FaxPress CoverPage commands, as shown below. |

| 3. | Type in the opening text that you want for your cover page, such as your name. |
| 4. | Type in the name of the first field you want to add, such as the To field. |
It is best to type in the text for all the fields you want in the default font and font size, and add all of the keyword fields to your cover page template, before making format changes. Also, it is best to add all of the field names and keyword fields before you add graphics to the template.
| 5. | Select the FaxPress CoverPage>To>To1 command to add the keyword field to your template, as shown below. |
| 6. | The field, in brackets, appears on your template. Press Enter, then enter the name of the next field, such as the Fax Number of the recipient. |
| 7. | Select the FaxPress CoverPage>Recipient>Fax No command to add the keyword field to your template, as shown below. |
| 8. | In a similar way, add the names of the fields and the keyword fields for other elements you want to add to your cover page template, such as the From field and the Fax No field in the From submenu, and the Subject field in the Miscellaneous submenu. The results are shown below. |
Keep in mind that you can change, reformat, or re-order the text you add to the template, but you CANNOT MODIFY any text or spaces between the brackets of the keyword fields. If you alter the text or spaces between the brackets, the field will not be recognized by the FaxPress software.
| 9. | To add the lines of the cover page message to your template, first enter the name of the field, then press Enter so that the first line of the message will be on a new line of the template, as shown below. |
| 10. | Choose the Message>Msg 1 command from the FaxPress CoverPage menu, as shown. You can then press Enter and choose the Message>Msg 2 command to add the field for the second line of the message. |
| 11. | Continue this process until you have entered all 16 message lines. DO NOT OMIT ANY OF THE 16 LINES, AND DO NOT ADD 17 LINES. The FaxPress server software requires 16 lines for the cover page message, and if you add more than 16 lines, the message will be included as an attachment of a new page. |
| 12. | When you have added all the fields you want on your cover page template, you can change the format of the descriptive text. Just make sure you do not change any of the text or spaces within the brackets of the keyword fields. An example of a formatted cover page is shown below. |
| 13. | When you are satisfied with your cover page template, save it with a unique name 8 characters long or less, to the folder: |
<hard drive>:\<installation directory>\Castelle\FaxPress\Personal Folders\Cover Page Templates
To add this cover page to the list you can choose from when you are creating a fax, start the FaxPress software, and in the FaxPress screen expand your mailbox and select the Cover Pages folder. Right-click in the blank space of the list for this folder and select Add.
| 14. | When the Open dialog box appears, browse to the |
C:\Program Files\Castelle\FaxPress\Personal Folders\Cover Page Templates
folder and select the name of the cover template you have created.
Click Open. A confirmation box appears. Click OK.
The cover page will now appear in your list of available cover pages in the Compose Fax Screen. You can select it and fill in the fields you specified, then send the fax.
Cover Pages for International Character Support
Cover pages created in WordPad can support the use of international (non-English) characters once the appropriate font type is applied.
Although the text of the bracketed fax keywords must not be modified, a font type that supports your language characters must be applied to the bracketed fax keywords.
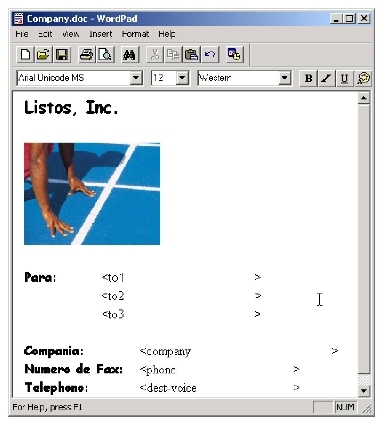
To support Spanish characters, for example, first select the entire bracketed fax keyword field, including the angle brackets, and then specify a font type that supports Spanish for the keyword field. Arial Unicode MS is one example of a multilingual font type that supports a wide variety of language characters. Again, only the font type of the keyword text should be changed. The keywords inside the angle brackets must stay in English and must also immediately follow the first angle bracket. To create space to accommodate additional characters in a field, use your spacebar to move the closing angle bracket further to the right. DO NOT replace or delete any of the existing spaces between the brackets.
Here is an example of a Spanish custom fax cover page created from the Coverpage.doc file. The boldfaced text appearing outside the angle brackets has been changed from English to Spanish, graphics have been added, and the font type Arial Unicode MS has been applied to the fax keywords and their angle brackets.
Publishing Optional Cover Pages
The FaxPress Cover Page publishing feature allows any user with Supervisor privileges to distribute a customized personal cover page to other FaxPress users. The distributed cover page will exist as an optional cover page for other users.
To distribute a customized personal cover page for other FaxPress users, follow these steps:
| 1. | Open FaxPress.(Start>Programs>FaxPress>FaxPress) |
| 2. | Expand the Mailbox branch and select the Cover Pages directory. |
| 3. | Right-click on the personal cover page you’d like to make available to other users, and select Publish. |
If you do not have Supervisor privileges, the Publish option will be grayed out.
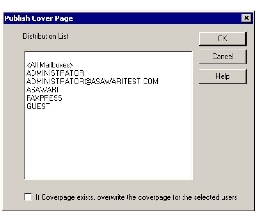
In the Publish Cover Page window, select the recipient(s), and click OK. This personal cover page will now exist as an optional cover page for the selected users.
|
FaxPress WebHelp
Last Updated: 9/12/2007
E-mail this page |
Castelle 855 Jarvis Drive, Suite 100 Morgan Hill, CA 95037 Toll-free 800.289.7555 Tel 408.852.8000 Fax 408.852.8100 |