Tomcat Setup
This tutorial explains the steps needed to setup CWS with Tomcat. When installing Content Server there is an option to let the installer automatically setup CWS or you can skip this installation step and setup CWS later manually. Both methods to setup CWS with Tomcat are explained in this tutorial.
Outline
Prerequisites
- Java 7 Installed - Java SE - Downloads
- Tomcat 7 Installed and Running - Apache Tomcat 7 Downloads
Installer Setup
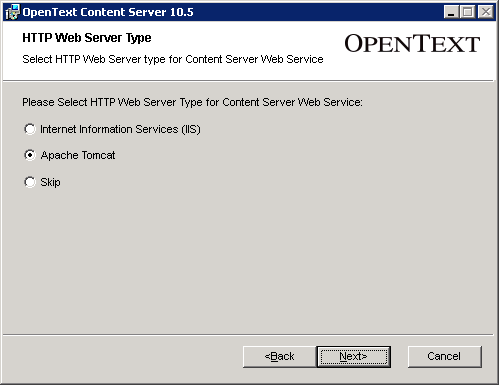
The first thing we need is to run the Content Server 16 installer and get to the option to Select the HTTP Web Server type for Content Server Web Service.
-
Select Apache Tomcat.
-
Select Next to continue.
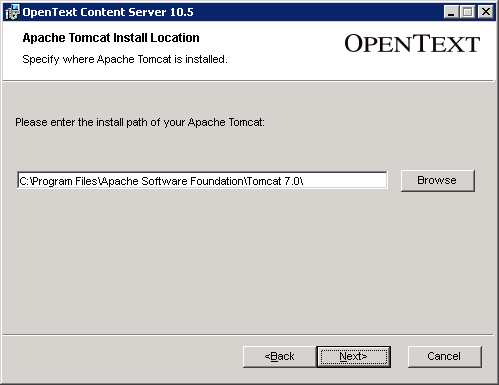
Next, specify where Tomcat is installed.
-
Enter or browse to the install path of Tomcat.
Note: The installer should default to find the Tomcat install path, but if not you will need to enter or browse to the directory where Tomcat is installed.
-
Select Next to continue.
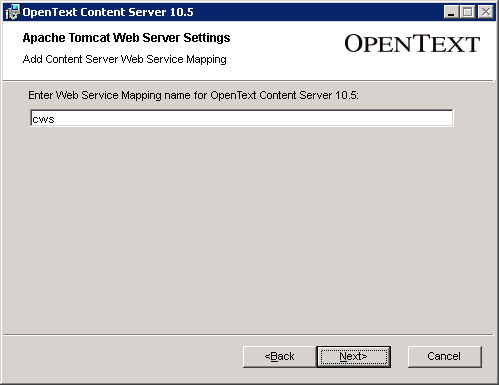
Next, configure the web service mapping.
-
Enter the mapping name for the CWS application. The default is
cws. This is the value used in the URL to access the services. -
Select Next to continue.
Finally, complete the Content Server installer and during the installation process CWS will automatically be deployed in Tomcat.
Manual Setup
To manually setup CWS in Tomcat:
-
Copy the OTHOME\webservices\java\webapps\cws.war file into the Tomcat webapps directory.
-
Restart Tomcat. Tomcat will detect the new WAR file and automatically deploy it. If you are using Tomcat, configure CWS to point to the correct Content Server.
-
Stop Tomcat. Open the Tomcat_HOME\webapps\cws\WEB-INF\web.xml file in an editor.
-
Locate the following lines:
<context-param>
<param-name>LivelinkServer</param-name>
<param-value>localhost</param-value>
</context-param>
-
Replace localhost with the fully-qualified domain name of the server that hosts Content Server:
<context-param>
<param-name>LivelinkServer</param-name>
<param-value>jojocpbx.opentext.net</param-value>
</context-param>
-
Locate the following lines:
<context-param>
<param-name>LivelinkServerPort</param-name>
<param-value>2099</param-value>
</context-param>
-
Replace 2099 with the port number of the server that hosts Content Server:
<context-param>
<param-name>LivelinkServerPort</param-name>
<param-value>50099</param-value>
</context-param>
-
Save and close the web.xml file and restart Tomcat.
Verification
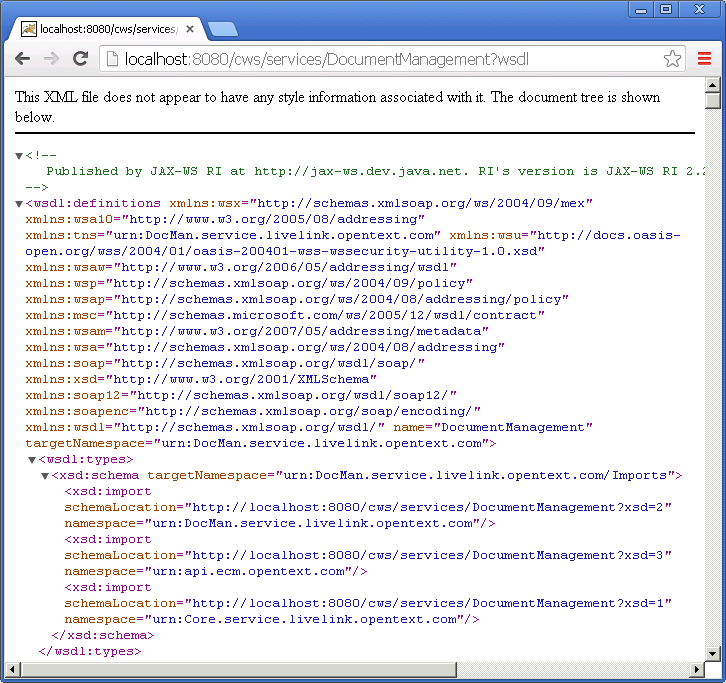
As a quick verification to make sure you have Setup correctly, view the DocumentManagement service WSDL in a browser:
http://localhost:8080/cws/services/DocumentManagement?wsdl
If everything is setup correctly you should see the DocumentManagement service WSDL similar to this: