Uploading Documents (C#)
This tutorial walks you through all the steps needed to start uploading documents to Content Server using the CWS API with C# and Visual Studio.
Outline
Setup Your Project
The first thing you need to do is create a new project. In your project you need to add a service reference for CWS and point it to each service we will use. In this sample we will use the following services:
- Authentication
- ContentService
- DocumentManagement
Create a New Project
-
Open Visual Studio.
-
Open the File menu and select New → Project... (Ctrl + Shift + N).
-
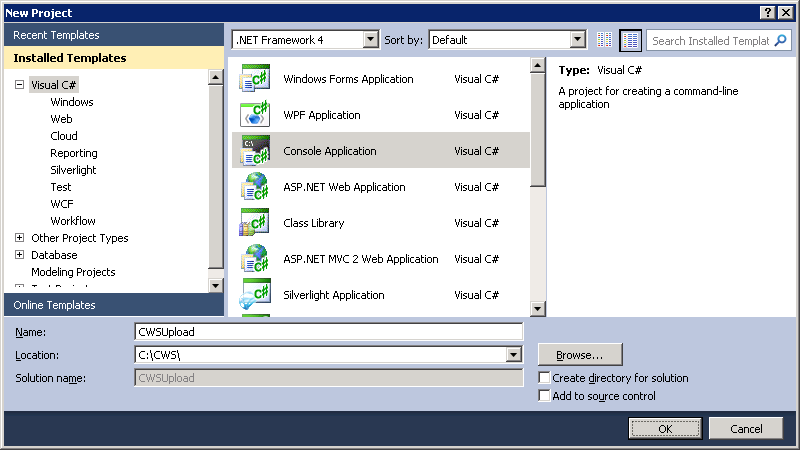
Select Visual C# as the project type, select Console Application as the project template, enter a name for the project, and then select OK.
Add a Service Reference
Next, we need to add a service reference for CWS and point it to each service we want to use. For this sample we need to use the following services:
- Authentication
- ContentService
- DocumentManagement
-
Open the Project menu and select Add Service Reference...
-
Enter the URL of the Authentication service in the Address box and select Go.
-
Enter
CWSas the namespace and select OK.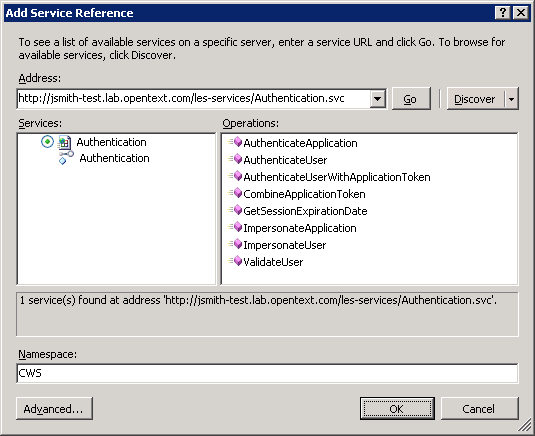
-
Open the Project menu and make sure the Show All Files option is selected. In the Solution Explorer, open the Service References → CWS → Reference.svcmap file.
-
Add a new
MetadataSourceelement for each one of the services we need to use.... <MetadataSources> <MetadataSource Address="http://localhost/cws/Authentication.svc" Protocol="http" SourceId="1" /> <MetadataSource Address="http://localhost/cws/ContentService.svc" Protocol="http" SourceId="2" /> <MetadataSource Address="http://localhost/cws/DocumentManagement.svc" Protocol="http" SourceId="3" /> </MetadataSources> ...
-
In the Solution Explorer, select the CWS service reference under the Service References folder. In the Project menu select Update Service Reference.
Modify the Service Configuration Settings
After you add a service reference you will see that an app.config file gets added to your project. The app.config file is simply just a configuration file for your application. For this sample we will make a few changes to the app.config file to change the default behaviour of the services.
-
Change the ContentService binding
transferModetoStreamed.This setting indicates whether a channel uses streamed or buffer modes for the transfer of messages. Setting the transferMode to Streamed for the ContentService binding will allow the message body to be read in smaller portions.
-
Change the ContentService binding
sendTimeoutto00:10:00(10 minutes).This setting indicates the time allowed for a write operation to complete before the transport raises an exception. Setting the sendTimeout to 10 minutes for the ContentService binding will allow for uploads to take up to 10 minutes before raising an exception.
<binding name="BasicHttpBinding_ContentService" closeTimeout="00:01:00"
	openTimeout="00:01:00" receiveTimeout="00:10:00" sendTimeout="00:10:00"
	allowCookies="false" bypassProxyOnLocal="false" hostNameComparisonMode="StrongWildcard"
	maxBufferSize="65536" maxBufferPoolSize="524288" maxReceivedMessageSize="65536"
	messageEncoding="Mtom" textEncoding="utf-8" transferMode="Streamed"
	useDefaultWebProxy="true">
	<readerQuotas maxDepth="32" maxStringContentLength="8192" maxArrayLength="16384"
		maxBytesPerRead="4096" maxNameTableCharCount="16384" />
	<security mode="None">
		<transport clientCredentialType="None" proxyCredentialType="None" realm="" />
		<message clientCredentialType="UserName" algorithmSuite="Default" />
	</security>
</binding>
Write Your Code
-
The first step is to authenticate a user. This sample uses basic Content Server authentication. The authentication token will be used by the other service clients. You will need to change the
usernameandpasswordto use valid credentials of a user on your system.// The user's credentials string username = "username"; string password = "password"; // Create the Authentication service client AuthenticationClient authClient = new AuthenticationClient(); // Store the authentication token string authToken = null; // Call the AuthenticateUser() method to get an authentication token try { Console.Write("Authenticating User..."); authToken = authClient.AuthenticateUser(username, password); Console.WriteLine("Success!\n"); } catch (FaultException e) { Console.WriteLine("Failed!"); Console.WriteLine("{0} : {1}\n", e.Code.Name, e.Message); return; } finally { // Always close the client authClient.Close(); }
-
Next, store the metadata for the upload in a method context on the server. You will need to change the
filePathto point to a file on your local system. You can also change theparentIDto upload the file to a different location, if needed.// The local file path of the file to upload string filePath = @"C:\temp\test.pdf"; // The ID of the parent container to add the document to int parentID = 2000; // Store the information for the local file FileInfo fileInfo = null; try { fileInfo = new FileInfo(filePath); } catch (Exception e) { Console.WriteLine("{0}\n", e.Message); return; } // Create the DocumentManagement service client DocumentManagementClient docManClient = new DocumentManagementClient(); // Create the OTAuthentication object and set the authentication token OTAuthentication otAuth = new OTAuthentication(); otAuth.AuthenticationToken = authToken; // Store the context ID for the upload string contextID = null; // Call the CreateDocumentContext() method to create the context ID try { Console.WriteLine("Generating context ID..."); contextID = docManClient.CreateDocumentContext(ref otAuth, parentID, fileInfo.Name, null, false, null); Console.WriteLine("Success!\n"); } catch (FaultException e) { Console.WriteLine("{0} : {1}\n", e.Code.Name, e.Message); return; } finally { // Always close the client docManClient.Close(); }
-
Finally, upload the file using the
contextIDfrom before. As you can see in this example, the UploadContent() method accepts four parameters. The contentServiceAuth, contextID, and fileAtts are actually sent as SOAP headers by the underlying framework. Only the fileStream is sent as part of the body of the service method (which meets the .NET requirements for the operation containing exactly one input parameter to stream data).// Create a file stream to upload the file with FileStream fileStream = null; try { fileStream = new FileStream(fileInfo.FullName, FileMode.Open, FileAccess.Read); } catch (Exception e) { Console.WriteLine("{0}\n", e.Message); return; } // Create the ContentService service client ContentServiceClient contentServiceClient = new ContentServiceClient(); // Create the FileAtts object to send in the upload call FileAtts fileAtts = new FileAtts(); fileAtts.CreatedDate = fileInfo.CreationTime; fileAtts.FileName = fileInfo.Name; fileAtts.FileSize = fileInfo.Length; fileAtts.ModifiedDate = fileInfo.LastWriteTime; // Call the UploadContent() method to upload the file try { Console.WriteLine("Uploading file..."); string objectID = contentServiceClient.UploadContent(ref otAuth, contextID, fileAtts, fileStream); Console.WriteLine("Success!"); Console.WriteLine("New document uploaded with ID = {0}\n", objectID); } catch (FaultException e) { Console.WriteLine("{0} : {1}\n", e.Code.Name, e.Message); return; } finally { // Always close the stream fileStream.Close(); // Always close the client contentServiceClient.Close(); }
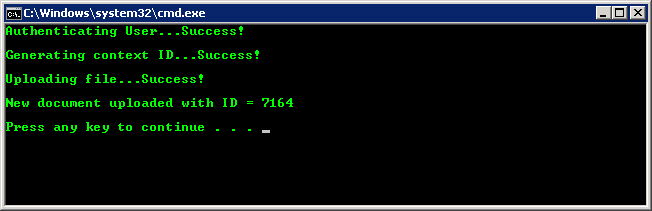
Run the Program
If everything is setup correctly you should be able to successfully run the program. You can double check that everything worked by looking at your Content Server instance in a browser and verifying the file has been uploaded.
-
Open the Debug menu and select Start Without Debugging (Ctrl+F5).